C# 강좌 : 제 5강 - RadioButton & CheckBox
프로젝트 구성
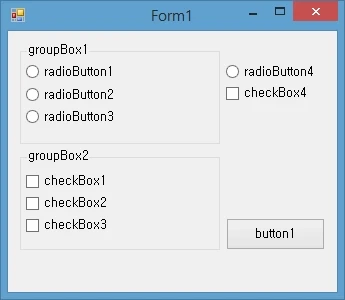
도구상자에서 Group Box, RadioButton, CheckBox, Button을 Form1에 생성합니다.
위 이미지와 같이 배치합니다.
도구 상자 속성
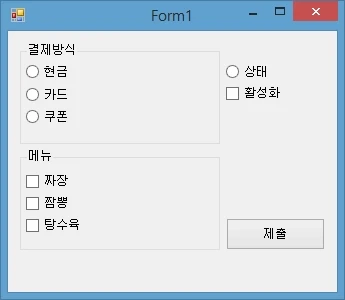
속성을 다음과 같이 설정합니다.
- GroupBox (1번)
- Text : 결제방식
- RadioButton (1번)
- Text : 현금
- RadioButton (2번)
- Text : 카드
- RadioButton (3번)
- Text : 쿠폰
- GroupBox (1번)
- Text : 현금
- CheckBox (1번)
- Text : 짜장
- CheckBox (2번)
- Text : 짬뽕
- CheckBox (3번)
- Text : 탕수육
- RadioButton (4번)
- Text : 상태
- AutoCheck : False
- Check (4번)
- Text : 활성화
- Button
- Text : 제출
- Tip :
RadioButton의 AutoCheck는 클릭으로 단추의 상태가 변경되지 않습니다.
CheckBox 이벤트 적용
checkBox4를 더블 클릭하여 이벤트를 생성합니다.
private void checkBox4_CheckedChanged(object sender, EventArgs e)
{
	if (checkBox4.Checked == true)
	{
		radioButton4.Checked = true;
		groupBox1.Enabled = true;
		groupBox2.Enabled = true;
	}
	else
	{
		radioButton4.Checked = false;
		groupBox1.Enabled = false;
		groupBox2.Enabled = true;
	}
}
세부 코드
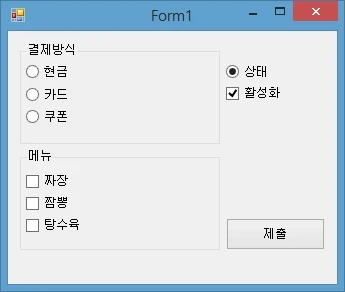
if (checkBox4.Checked == true)CheckBox4가 활성화 됐을 때 아래의 문장을 실행시킵니다.
radioButton4.Checked = true;
groupBox1.Enabled = true;
groupBox2.Enabled = true;radioButton4의 체크 상태를 활성화 시킵니다.
groupBox1, groupBox2 컨트롤을 사용 가능상태로 만듭니다.
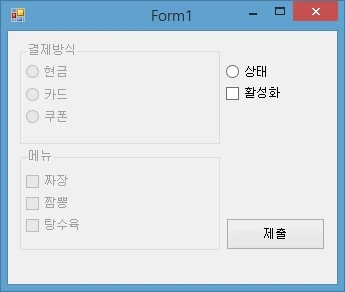
- Tip :
Visible은 컨트롤의 표시 여부입니다. False시 Form에 보여지지 않습니다.
소스 코드를 입력을 완료하면, 위 이미지와 같은 형태가 됩니다.
RadioButton 이벤트 적용
string rad ="미선택";
int cost = 0;
상단에 rad 변수와 cost 라는 변수를 생성하고 초기값을 부여합니다.
- Tip : 상단의 변수는 같은 폼 안에서 변수가 변경되도 계속 업데이트됩니다.
private void button1_Click(object sender, EventArgs e)
{
if (radioButton1.Checked == true) rad = "결제:현금";
else if (radioButton2.Checked == true) rad = "결제:카드";
else if (radioButton3.Checked == true) rad = "결제:쿠폰";
else rad = "미선택";
cost = 0;
if (checkBox1.Checked == true) cost += 3500;
if (checkBox2.Checked == true) cost += 4000;
if (checkBox3.Checked == true) cost += 10000;
if (rad == "미선택" || cost == 0) return;
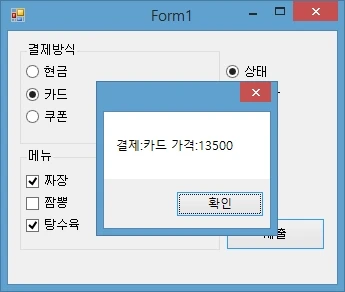
MessageBox.Show(rad + " 가격:" + cost);
}radioButton이 체크될 때마다, rad라는 변수에 값을 변경하여 저장합니다.
else if는 맨 위의 if가 참 값이 아닐 때 실행합니다.
else는 모든 값이 침 깂이 아닐 때 실행됩니다. checkBox 또한 같습니다.
+= 는 값을 누적하여 연산합니다.
세부 코드
if (rad == "미선택" || cost == 0) return;
MessageBox.Show(rad + " 가격:" + cost);
rad가 미선택이거나 cost가 0일 경우 return하여 마지막 문장까지 진행하지 않고 도중에 종료합니다.
- Tip :
or (||)는 둘 중 하나만 참 값이여도 true로 반환하며,and (&&)는 둘 다 참 값이여야 true로 반환합니다.
MessageBox.Show는 메세지 박스를 띄웁니다. 소괄호 안에 들어갈 문구가 입력됩니다.
전체 코드
using System;
using System.Collections.Generic;
using System.ComponentModel;
using System.Data;
using System.Drawing;
using System.Linq;
using System.Text;
using System.Threading.Tasks;
using System.Windows.Forms;

namespace Project
{
    public partial class Form1 : Form
    {
        string rad ="미선택";
        int cost = 0;

        public Form1()
        {
            InitializeComponent();
        }

        private void checkBox4_CheckedChanged(object sender, EventArgs e)
        {
            if (checkBox4.Checked == true)
            {
                radioButton4.Checked = true;
                groupBox1.Enabled = true;
                groupBox2.Enabled = true;
            }
            else
            {
                radioButton4.Checked = false;
                groupBox1.Enabled = false;
                groupBox2.Enabled = true;
            }

        }

        private void button1_Click(object sender, EventArgs e)
        {
            if (radioButton1.Checked == true) rad = "결제:현금";
            else if (radioButton2.Checked == true) rad = "결제:카드";
            else if (radioButton3.Checked == true) rad = "결제:쿠폰";
            else rad = "미선택";

            cost = 0;
            if (checkBox1.Checked == true) cost += 3500;
            if (checkBox2.Checked == true) cost += 4000;
            if (checkBox3.Checked == true) cost += 10000;

            if (rad == "미선택" || cost == 0) return;
            MessageBox.Show(rad + " 가격:" + cost);
        }
    }
}
공유하기
 Kakao
Kakao
 Naver
Twitter
LinkedIn
Facebook
Naver
Twitter
LinkedIn
Facebook
댓글 남기기